

A heavy homemade loaf can look perfectly browned until you cut it open and find a tight crumb where the air pockets should be.
Bread usually turns out dense because the dough is too dry, does not rise enough, or cannot hold the gas it produces. Check whether the crumb is dry, gummy, or collapsed, then review flour measurement, yeast activity, dough development, proofing, and baking before changing one variable on your next loaf.
The clues are in the slice and in what the dough did before baking. Start there before changing your recipe.
Key Takeaways
- A dry, tight crumb points first toward excess flour, too little water, or too little rise.
- A gummy center calls for a different check: baking time, cooling, and whether the dough was fully fermented.
- If a loaf rose and then sank, investigate overproofing or weak dough rather than adding more yeast.
- Weigh flour when possible, judge proofing by the dough, and change one likely cause per bake.
Dense Bread Symptoms and Likely Fixes
A dense loaf can fail in several ways. Match its crumb and shape to the most useful first check, then use the sections below to narrow the cause.
| What you see | Check first | Try next time |
|---|---|---|
| Dry, tight crumb; little rise | Dough too stiff or rise cut short | Weigh flour; assess dough texture and rise |
| Tiny holes; split crust | Loaf baked before final proof finished | Give shaped dough more time to expand |
| Sunken top; wrinkled sides | Overproofing or weak structure | Bake sooner; develop and shape dough gently |
| Sticky or gummy center | Underbaking, early slicing, or fermentation | Check doneness; cool before slicing |
| Heavy bottom; pale sides | Oven heat or pan placement | Preheat fully; use the recipe's rack position |
Why Is My Bread Dense?
For a standard yeast loaf, dense bread usually comes down to one of three problems: the dough did not make enough gas, could not stretch around it, or lost that gas before baking set the crumb.
Start with the finished loaf. Dry and tight, moist and gummy, and sunken after a big rise are different problems. Treating all three with extra yeast is likely to miss the cause.

Think back to the dough, too. Was it stiff and hard to knead?
Did it visibly expand during either rise? Did the shaped loaf puff up, then flatten while the oven heated?
For a basic sandwich loaf, the flour matters, but it is not the only variable. If you are choosing flour for a future bake, this guide to the best flour for bread baking at home Press a floured fingertip gently into the dough, roughly a fingertip’s depth.
An indentation that springs back immediately can suggest it needs more time; one that returns slowly and partly may suggest it is ready.
One loaf may have more than one issue. A stiff dough can rise slowly, tempting you to bake it early; the result can be both dry and underproofed.
How to Tell Why Bread Is Dense
A loaf that looks brown outside can still be gummy in the middle. Check the recipe’s doneness instructions; many bakers use an internal temperature check as one signal of doneness, with enriched sandwich loaves often finishing lower than lean, crusty loaves, but rely on your recipe’s specific guidance rather than a single fixed number.
A tight crumb with small, evenly spaced holes often suggests restricted expansion. It may come from stiff dough, insufficient fermentation, or a recipe designed for a fine sandwich-bread texture.

A tacky streak through the middle is different. Press a cooled slice lightly: a baked crumb should spring back, while a gummy area may smear on the knife or compress into a paste.
Notice the crust as well. A loaf with a sharply split side may have expanded rapidly in the oven after being baked too early; a loaf with a sagging top may have lost its structure before or during baking.
Don’t diagnose by hole size alone. A whole-wheat sandwich loaf will naturally look different from a lean, crusty loaf, and a single big tunnel can come from shaping rather than a lack of yeast.
Dry, Tight Bread Crumb
Dry, compact bread is the strongest reason to check the flour-to-water balance. If the dough felt hard, rough, or unwilling to stretch, note whether you scooped flour into the measuring cup or added handfuls while kneading.
If the dough felt supple but barely grew, shift your attention to yeast, temperature, and proofing time instead. The same-looking slice can have a different cause.

Gummy or Underbaked Bread
A sticky center does not automatically mean you needed more flour. The loaf may need more baking time, or it may have been sliced before the crumb finished setting as it cooled.
Gumminess can also appear in a loaf that did not ferment enough, especially if it is heavy throughout. Compare the center with the edges and recall whether the dough expanded before baking.
Bread That Rose Then Collapsed
A sunken crown or wrinkled sides point toward a loaf that could not hold its shape. Overproofing is one possibility; weak gluten development, overly aggressive handling, or a recipe that does not suit the pan can also contribute.
Check when the collapse happened. Dough that sank before it entered the oven likely needed an earlier bake, while a loaf that fell during baking deserves a closer look at proofing and structure.
Can Too Much Flour Make Bread Dense?
Yes. Too much flour makes dough stiff, which limits how far it can stretch as gas builds.
The baked loaf can be small, heavy, and dry even when the yeast is working.
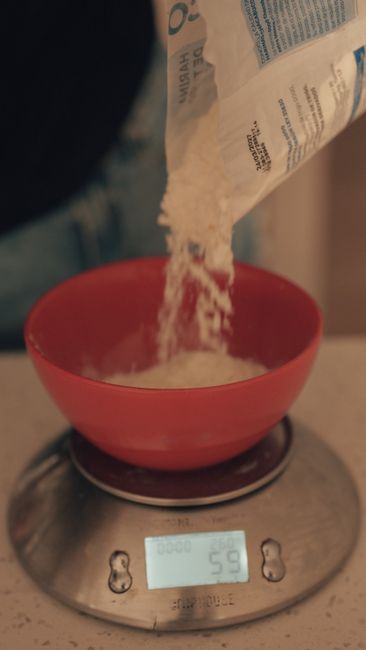
Cups are a common source of error: dipping a cup straight into a flour bag packs in more flour than gently filling it. Use the gram weight in your recipe if it provides one, and weigh the flour on a kitchen scale.

If you have only cups, fluff the flour, spoon it into the cup, and level the top without pressing it down. Use the same method each time so a useful recipe is not derailed by a different scoop.
While kneading, use just enough flour on the counter to keep the dough manageable. A slightly tacky dough may become smoother as you work it and as the flour absorbs moisture; coating it repeatedly in flour can turn a good formula into a stiff one.
Don’t correct every sticky dough by adding flour. Some recipes are deliberately wet, and whole-grain flour can take time to absorb water. Rest the dough as directed before deciding it needs an adjustment.
If a familiar dough is unusually firm despite accurate flour measurement, check that you added the full amount of liquid and measured it correctly. Correcting a missing ingredient early in mixing is easier than trying to repair a shaped loaf.
Did the Dough Rise Enough Before Baking?
If the dough never expanded much, the loaf has little gas to hold. Weak yeast, cool dough, a short rise, or an ingredient-measuring mistake may be responsible.
Active dry yeast and instant yeast can both raise bread, but use the type and amount specified by your recipe unless you know its substitution guidance. Check the package date and store yeast as directed; old yeast may be less reliable.
For active dry yeast, follow the recipe’s directions for mixing or dissolving it. If you suspect the yeast has failed, use a fresh batch for the next loaf rather than increasing the amount at random.
Watch the dough, not just the timer. A cooler kitchen may slow fermentation, while a warmer one may speed it up.
The recipe’s suggested rise time is a planning estimate, not permission to bake dough that has barely changed.
Mark the starting height on a straight-sided container for the first rise. That makes expansion easier to see than it is in a wide bowl, especially with firm dough.
Don’t assume every recipe must double at every stage. Follow its stated rise target and look for dough that has gained volume and feels lighter; heavily enriched and whole-grain doughs may behave differently from a lean white loaf.

If there was no visible rise at all, check the full ingredient list before blaming the weather. Missing yeast, a substantial measuring error, or the wrong bread-machine cycle can all leave dough nearly unchanged.
Was the Bread Underproofed or Overproofed?
Underproofed dough goes into the oven before it has built enough gas. Overproofed dough has expanded beyond what its structure can reliably support; either can leave a loaf that looks disappointingly heavy.
For the final proof, look at the shaped loaf rather than guessing from elapsed minutes. It should appear fuller and feel airy, but it should still hold its shape.
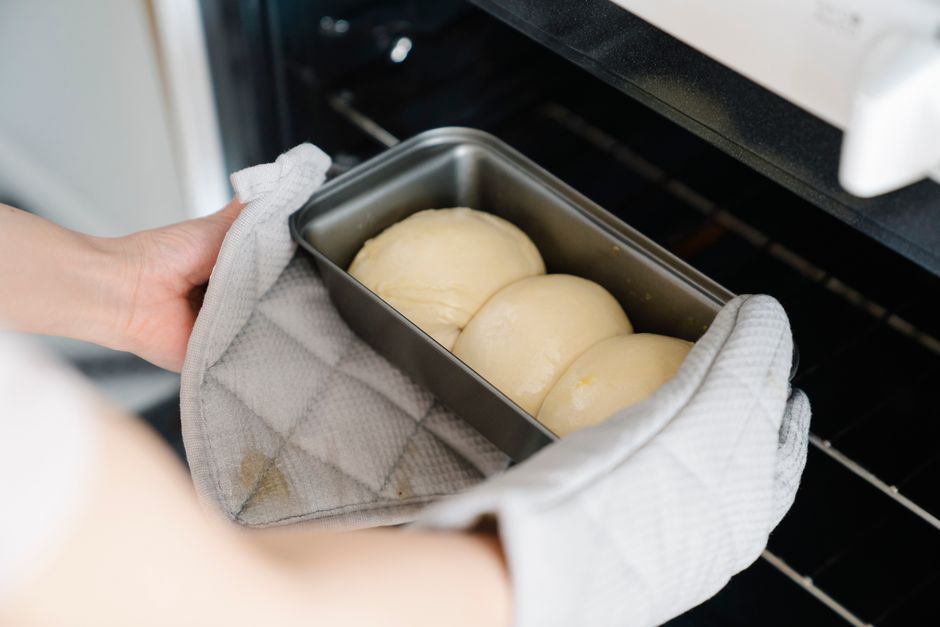
Press a floured fingertip gently into the dough, about 1/2 inch deep. An indentation that springs back immediately can suggest it needs more time; one that returns slowly and partly may suggest it is ready.
If the dent stays and the loaf feels fragile or deflates, it may be overproofed. The fingertip test is a clue, not a universal rule—very wet or whole-grain dough can respond differently.
Underproofed loaves often burst dramatically along the side or bottom because expansion continues after the crust starts to set. Overproofed loaves are more likely to spread, sink, or show little oven spring.
If dough is clearly underproofed, let it rise longer within the recipe’s method. If it is already sagging, handle it gently; some doughs can be reshaped and proofed again, but repeated handling may weaken the result.
Can Weak Gluten Make Bread Dense?
Yes. Bread dough needs enough structure to trap and retain gas.
If it tears readily, spreads rather than standing up, or collapses when moved, check mixing, kneading, folds, and shaping.
Kneading develops structure in many standard yeast breads. Work the dough until it becomes smoother and more elastic according to your recipe; stop relying on a fixed number of minutes if the texture is still rough or tears immediately.

For a wetter, no-knead-style dough, the recipe may build strength through resting and folding instead. Don’t add kneading to a method that depends on a different schedule without considering the whole recipe.
A small piece of dough that stretches into a thin sheet before tearing can indicate useful development. It is not a pass-or-fail test for every dough, particularly dough with coarse whole-grain particles.
Shaping matters after fermentation. If you loosely roll a sandwich loaf, it may spread or leave large gaps; if you press out every bubble aggressively, you can lose volume and create a tighter crumb.
Aim for a snug, even shape with the seam pinched closed, following the recipe’s method. For recipes with a shaped garlic loaf, a garlic bread loaf recipe is a different bake from plain sandwich bread, so judge its crumb against the loaf it is meant to be.

Flour choice sets the ceiling for structure, too. Bread flour is commonly used for chewy, well-risen loaves, while all-purpose flour may give a softer result; neither makes poor proofing disappear.
Can Baking Cause a Dense Loaf?
Baking cannot create the rise the dough never had, but oven conditions affect how well a proofed loaf expands and sets. A poorly preheated oven may give the loaf less early lift and leave the crust and center baking unevenly.
Preheat for the full time your recipe recommends, and check the oven with a separate thermometer if its temperature seems unreliable. Place the loaf on the specified rack so the bottom and top bake as intended.

A loaf that looks brown outside can still be gummy in the middle. Check the recipe’s doneness instructions; for many enriched sandwich loaves, an internal temperature around 190°F is a useful check, while lean crusty loaves may be baked to a higher temperature.
Temperature is only one clue. If the center still feels pasty after cooling, compare bake time, pan size, oven temperature, and whether the dough was properly proofed.
Let the loaf cool on a rack before slicing. Cutting into hot bread can compress the soft crumb and make a properly baked loaf seem gummy.
If you bake without the equipment a recipe specifies, account for how the oven holds heat and how the dough is supported. This guide to how to bake bread without a Dutch oven is relevant when a crusty loaf recipe calls for one but you do not have it.
Why Is Whole-Wheat or Sourdough Bread Dense?
Whole-wheat bread and sourdough need their own checks. Comparing either with the open crumb of a white-flour bakery loaf can make a normal, fine-textured result look like a failure.
Whole-wheat flour contains bran and germ, and its dough can feel stiffer as it absorbs water. Start with a recipe written for your flour mix rather than swapping all the white flour for whole wheat without changing anything else.
Give whole-grain dough the rest specified by its recipe so the flour can hydrate. Judge its success by tenderness, volume, and an even crumb—not by whether it has enormous holes.
For sourdough, make sure the starter is active enough for the recipe and that the dough has fermented sufficiently. A sluggish starter plus a cool kitchen can produce a loaf that looks shaped correctly but stays tight and heavy.
If sourdough spreads flat after a long rise, the issue may be overfermentation or weak structure instead. Change the fermentation schedule only after noting how the dough grew and felt during folds and shaping.
Enriched doughs made with butter, eggs, or sugar may rise more slowly than lean dough. Use the expected texture and rise cues for that specific recipe rather than borrowing times from a plain flour-and-water loaf.
Why Is Bread Machine Bread Dense?
For a bread-machine loaf, check the recipe, ingredient order, and selected cycle first. The machine controls mixing and proofing, so a cycle meant for a different dough can change both structure and rise.
Use a recipe matched to your machine’s loaf size and cycle. Measure flour carefully, add the specified amount of liquid, and check the manufacturer’s directions for where yeast belongs in the pan.
When the manual permits it, look at the dough during its early kneading stage. A hard, dry lump suggests a flour or liquid problem; a batter-like mixture suggests the opposite.
Make only the small adjustments your machine’s guidance recommends.
If the dough looked balanced but the finished top sank, note when that happened and confirm you used the intended cycle and yeast quantity. More yeast is not automatically the fix for a collapsed machine loaf.
How to Fix Dense Bread Next Time
Change the most likely cause first, not the entire recipe. This short sequence gives you a useful record even if the next loaf still needs work.
- Photograph the cooled slice and note whether it was dry, gummy, flat, or sunken. Write down how much the dough rose before baking.
- Repeat the same recipe with the same pan and flour. Weigh flour if the recipe supplies a weight, and measure the liquid carefully.
- Check your yeast and follow the recipe’s mixing method. Note whether the dough feels stiff, supple, or unusually wet after its specified rest.
- Develop and shape the dough as directed, then follow its visual rise cues. Record the approximate kitchen temperature and actual rise time.
- Preheat the oven fully, bake until the recipe’s doneness cues are met, and cool the loaf before slicing. Compare the new crumb with your photo.
If the second loaf is better, keep that change and repeat it. If it is not, move to the next likely cause—such as dough development or proofing—rather than changing flour, yeast, water, and oven temperature together.
Dense bread is often still useful once fully baked and cooled. Toast slices for a sturdier bite, or use them for croutons or breadcrumbs if the crumb is dry rather than gummy.
Store a loaf based on the texture you actually have; storage will not turn a tight crumb airy. For keeping an otherwise good loaf from drying out, see how to store homemade bread to keep it fresh.
The Bottom Line
Start with the cooled slice: dry and tight suggests a dough or rise problem, while gummy or sunken bread needs a different check.
On the next bake, measure carefully, watch the dough’s expansion, and change only the most likely variable. That gives you a clearer answer than adding extra yeast and hoping for the best.
Frequently Asked Questions
Why is my homemade bread heavy and tight inside?
The dough may have been too stiff, risen too little, or lacked enough structure to hold gas. Check how you measured flour, whether the dough visibly expanded, and how it felt during shaping.
Can measuring flour by cups make bread dense?
Yes. Flour can pack into a cup, especially when scooped from the bag, leaving you with more than the recipe intended.
Weigh it when a recipe gives a gram amount; otherwise spoon it into the cup and level it.
How can I tell if dense bread was underproofed or overproofed?
An underproofed loaf often enters the oven small and may split sharply as it expands. An overproofed loaf may look swollen and fragile before baking, then spread or sink; compare those signs with what you saw during the final rise.
Does dense, gummy bread mean it is underbaked?
Possibly, but not always. Check whether the center was still pasty after the loaf cooled, and review bake time and doneness cues.
Insufficient fermentation or slicing while hot can also contribute to a gummy texture.
Can I save a dense loaf after baking?
You cannot make its crumb airy after baking. If it is fully baked, try toasting it or turning a dry loaf into croutons or breadcrumbs; if the center is gummy, don’t treat it as ordinary dry bread.